
Vegan Brown Sugar and Raisin Scones
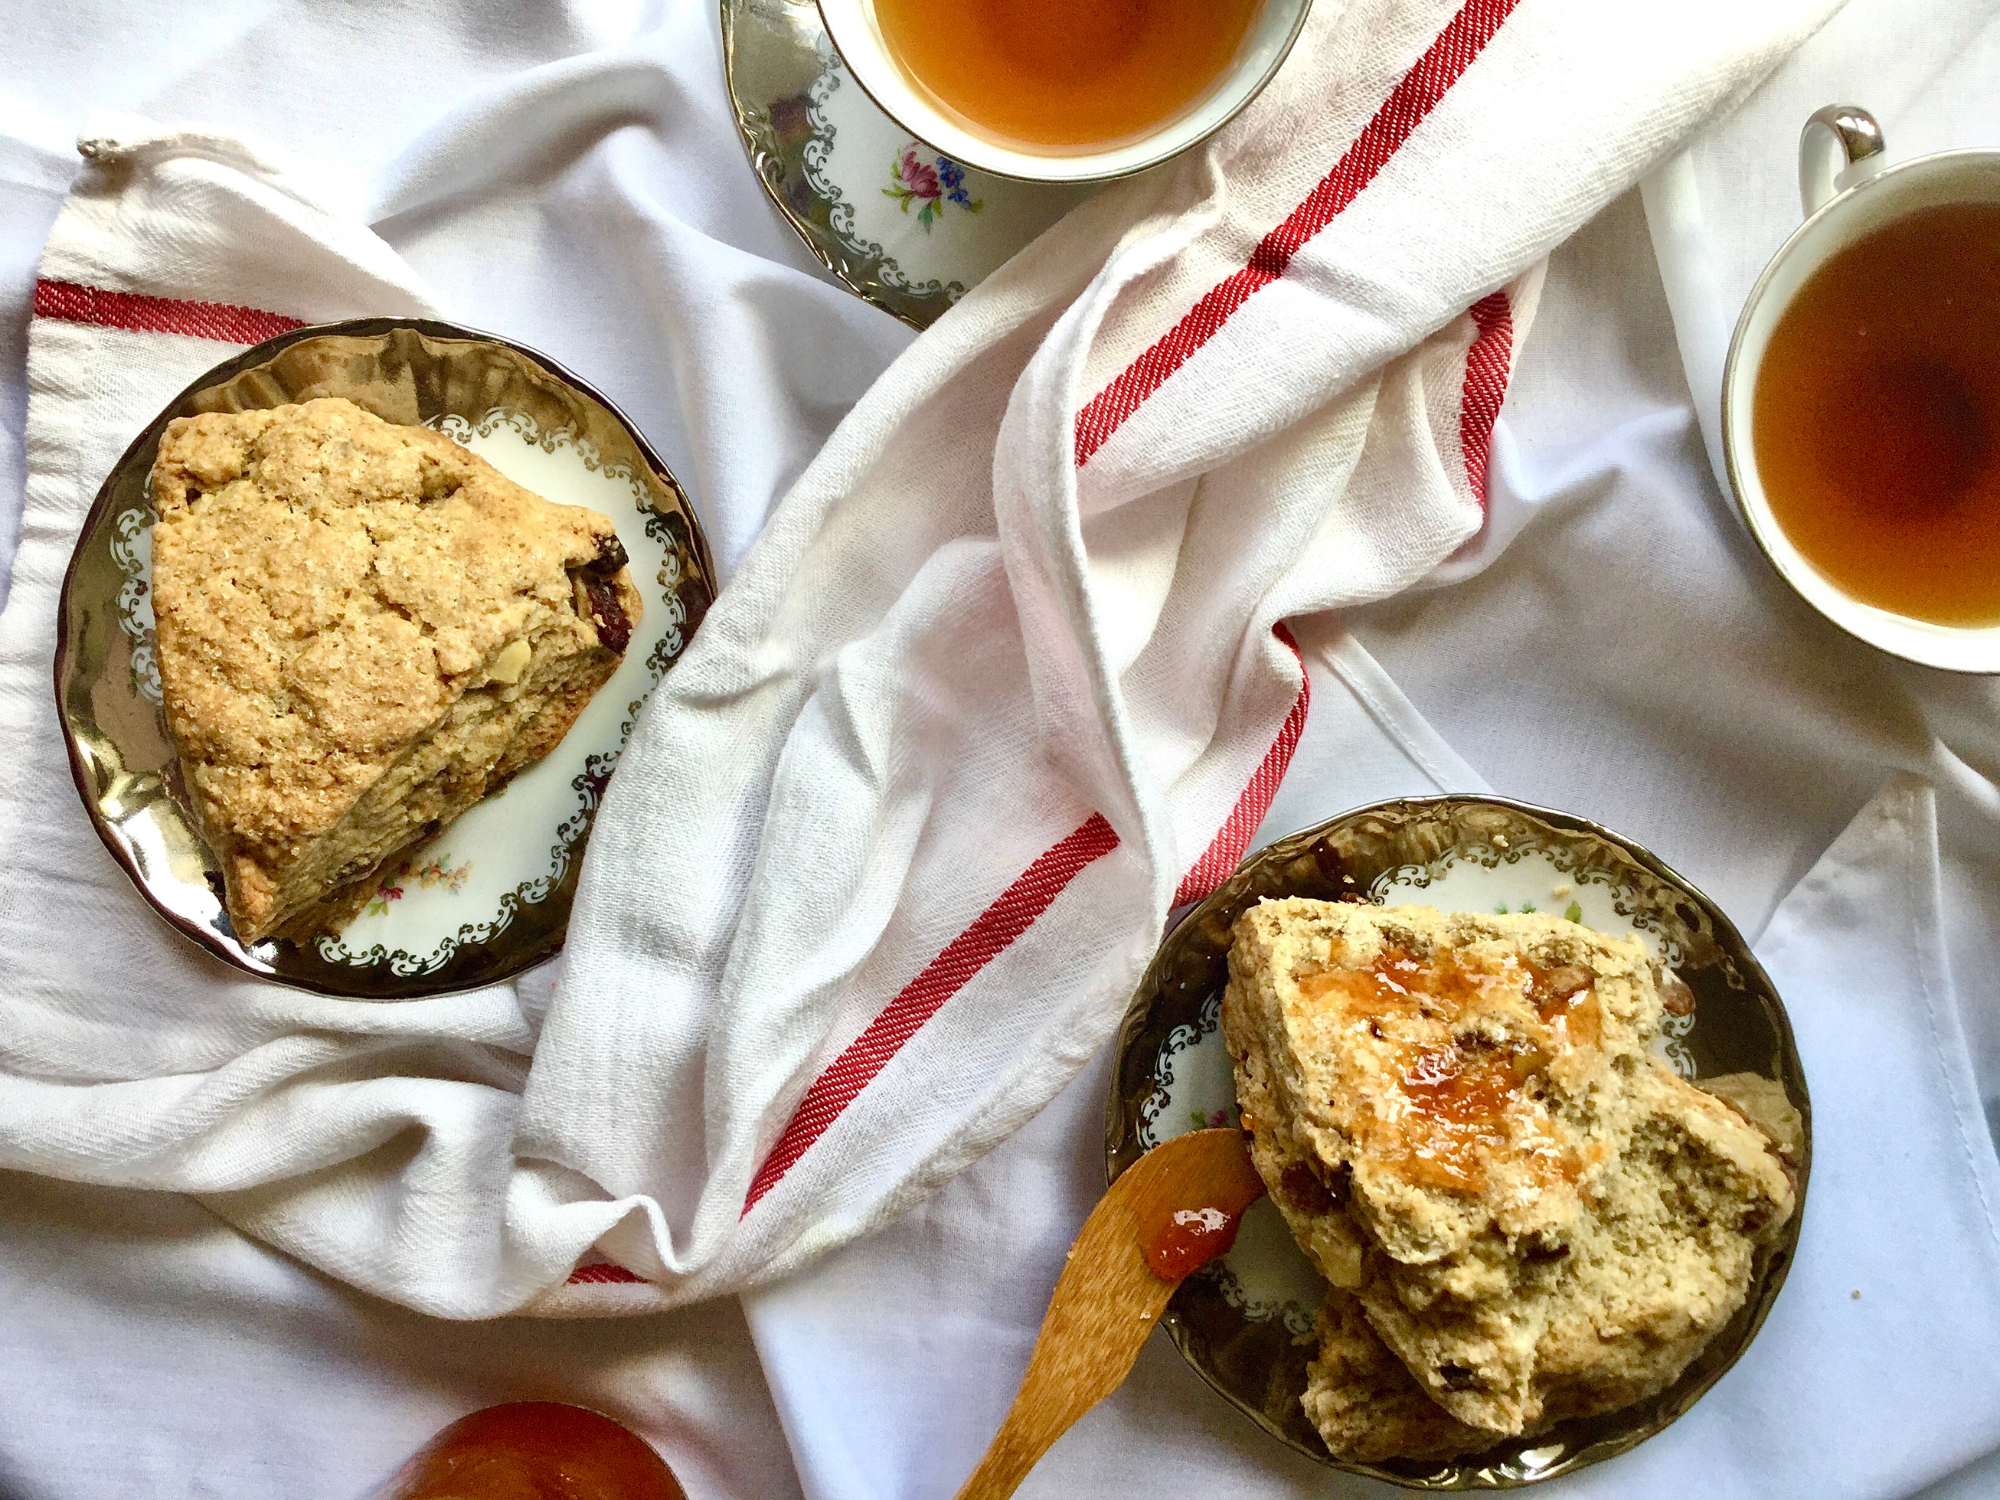
These customizable and deliciously tender vegan brown sugar and raisin scones are great for breakfast (albeit not that healthy) or dessert. Feel free to experiment with different add-ins like dried cranberries or apricots, pecans, pepitas or anything that suits your fancy. And may I suggest perhaps having them with some earl grey tea?
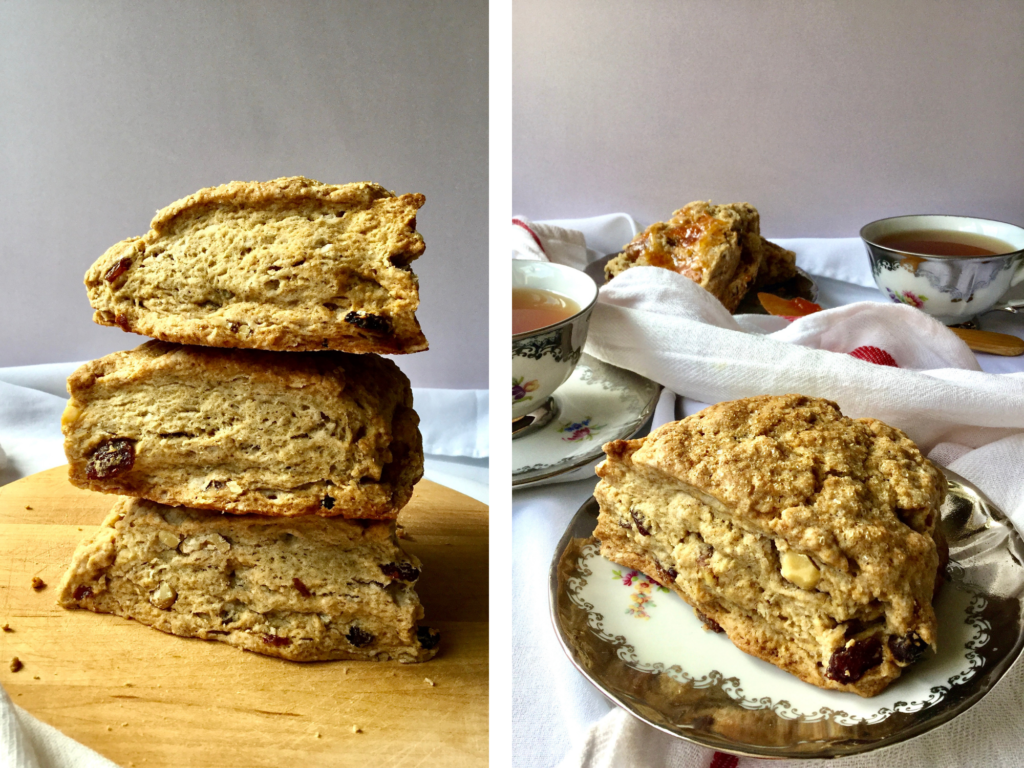
I’ve never been much of a scone person, never really saw the big hoopla. But it’s hard to say no when it’s a big “buttery” bakery-style scone. Which is exactly what these are. The brown sugar, raisin and cinnamon combination is reminiscent of a certain *raisin flake* cereal and is honestly better than I expected! Even if they’re hefty, it’s hard to stop once you start eating. Plus, the walnuts add a lovely crunch to every bite.
Making these vegan brown sugar raisin scones
I made these scones with coconut oil. But feel free to swap it for some vegan butter! As for the add-ins, you can change them up, but be sure to keep the same quantities and to avoid very wet ingredients.


Besides that, scones in general are a simple and straightforward baked good to make as long as you follow the right techniques. So here are a few tips and tricks to keep in mind.
Some tips and tricks
1. Firstly, as with most pastries, you don’t want to overwork the dough once you add the liquid ingredients. This will keep gluten development to a minimum and result in a light and flaky scone, instead of a dense and tough one.
2. Rubbing the fat into the flour also helps with texture. It coats the flour and creates somewhat of a barrier between it and the liquids. Just like pie dough. Use your fingertips to rub the fat in to avoid warming up the mixture too much.
3. Working with cold ingredients keeps the fat in pieces and sprinkled throughout the dough. That way, once the scones are in the oven, it melts and creates pockets that yield a flaky scone. If the fat melts while making the dough, it results in a cookie-like texture. If you feel the fat softening, stick the bowl in the fridge or freezer for a few minutes.
4. When it’s hot out, put your (metal) bowl in the fridge for about 30 minutes before you start making the dough. And if you have hot hands, work with a pastry cutter for the first step of the recipe.
5. Your scone dough shouldn’t feel sticky and it shouldn’t be smooth. It should look craggy and it will be slightly crumbly. The more liquid is added, the denser it will be and the more it will spread rather than rise.
6. Once you’ve shaped the scones, place them on your baking sheet and in the fridge for 30 minutes. This lets the gluten relax and the fat get really cold to prevent the scones from spreading too much.
If you make this recipe please let me know in the comments! All feedback is very much appreciated and I would love to hear from you! You can also tag me on instagram @the.quaint.kitchen or use the hashtag #thequaintkitchen to share your creations!
Vegan Brown Sugar and Raisin Scones
Ingredients
Scones
- 180 g refined coconut oil, or vegan butter
- 200 g plant based milk
- 15 g apple cider vinegar, or lemon juice
- 500 g all purpose flour
- 50 g white granulated sugar , make sure it’s vegan
- 100 g brown sugar
- 1½ tsp cinnamon
- 1/2 tbsp baking powder
- 1 tsp baking soda
- 1/4 tsp salt
- 90 g dried raisins
- 50 g walnuts
Glaze (optional)
- 1 tbsp plant based milk
- 1/2 tbsp maple syrup
- pinch of salt
Topping
- coarse sugar, I used turbinado
Instructions
Glaze
- Mix the ingredients together in a small bowl and set aside.
Scones
- Line a baking sheet with parchment or a silicone mat.
- Weigh your coconut oil and place it in the fridge or freezer until solid.
- Mix together the milk and apple cider vinegar and place in the fridge as well to curdle and stay cold. This will be the “buttermilk”.
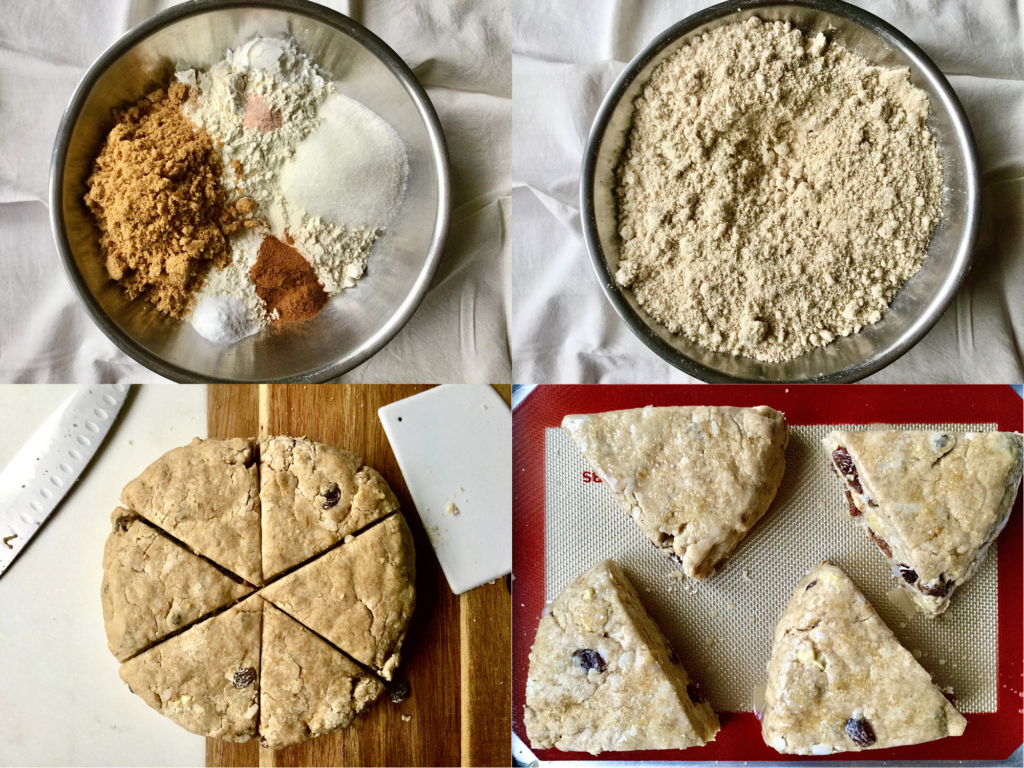
- Whisk together the flour, white and brown sugar, cinnamon, baking powder, baking soda and salt.
- With your fingertips or a pastry cutter, rub the coconut oil into the dry ingredients until you get a bread crumb texture and there are no big chunks of coconut oil left. If the oil starts to feel soft or melt, stick the bowl in the fridge or freezer for 10 minutes until cold then continue.
- Add the raisins and walnuts and stir them in.
- Pour in the “buttermilk” and, starting with a spatula, stir the mixture until a rough dough forms.
- Tip it out onto a very lightly floured surface and give it just enough kneads for the dough to hold it’s shape. I like to do this by giving it a few folds.
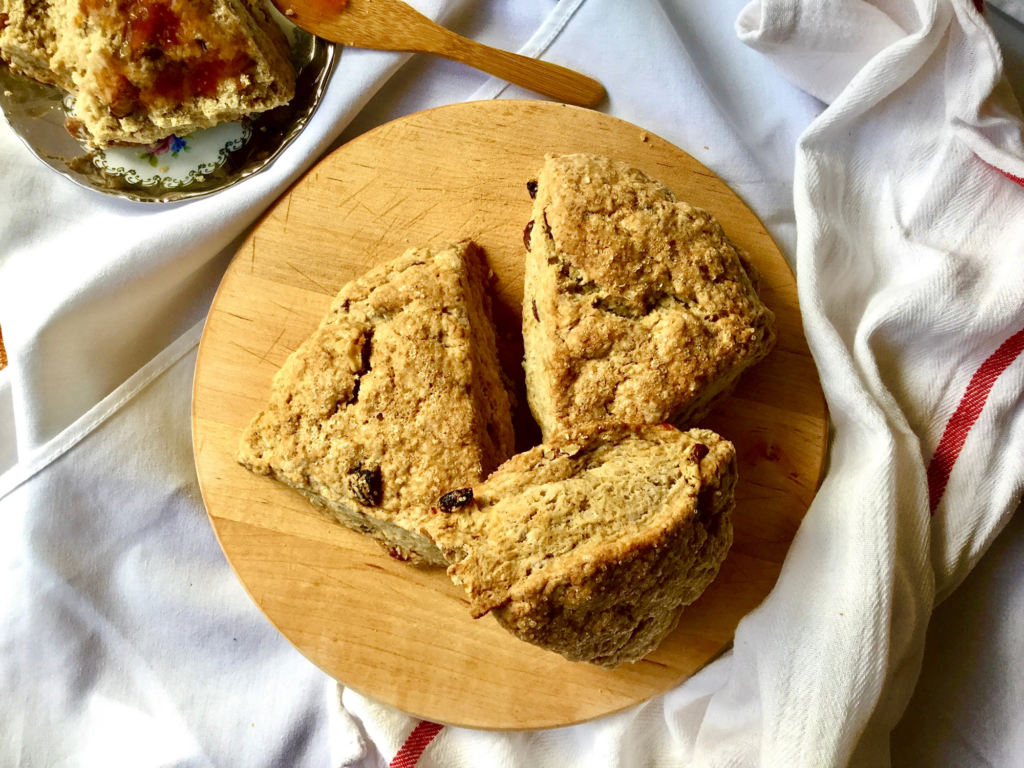
- Shape the dough into a circle about 2cm/1.5 inches thick and cut it into 6 even triangles. If you prefer smaller scones, shape the dough into a square or rectangle about the same thickness and cut into squares the size you want.
- Place them on the baking sheet about an inch apart and put them in the fridge for 30 minutes.
- Preheat your oven to 180°C/350°F. Brush the tops of the scones with the glaze and sprinkle coarse sugar on top.
- Bake them for 20-25 minutes then place them on a cooling rack until you can enjoy without scorching your mouth.
Notes
- *Disclaimer: I have a tiny not-so-great oven, so your bake time may vary from mine.
- I strongly suggest making recipes by weight, if you make them by cups I can’t guarantee that you’ll get the same results.
- Feel free to toast the walnuts, but make sure to let them cool completely before mixing them in. For some reason I prefer raw walnuts in these scones.
- If you want to swap the add-ins for other ingredients like dried cranberries, pecans, etc., make sure to respect the same quantities and avoid ingredients that are too wet.
- I like to microwave the scone before eating it to soften the coconut oil since it hardens at room temperature.
- These will last a week at room temperature. You can easily freeze these scones tightly wrapped. Preferably raw, but baked works too.