
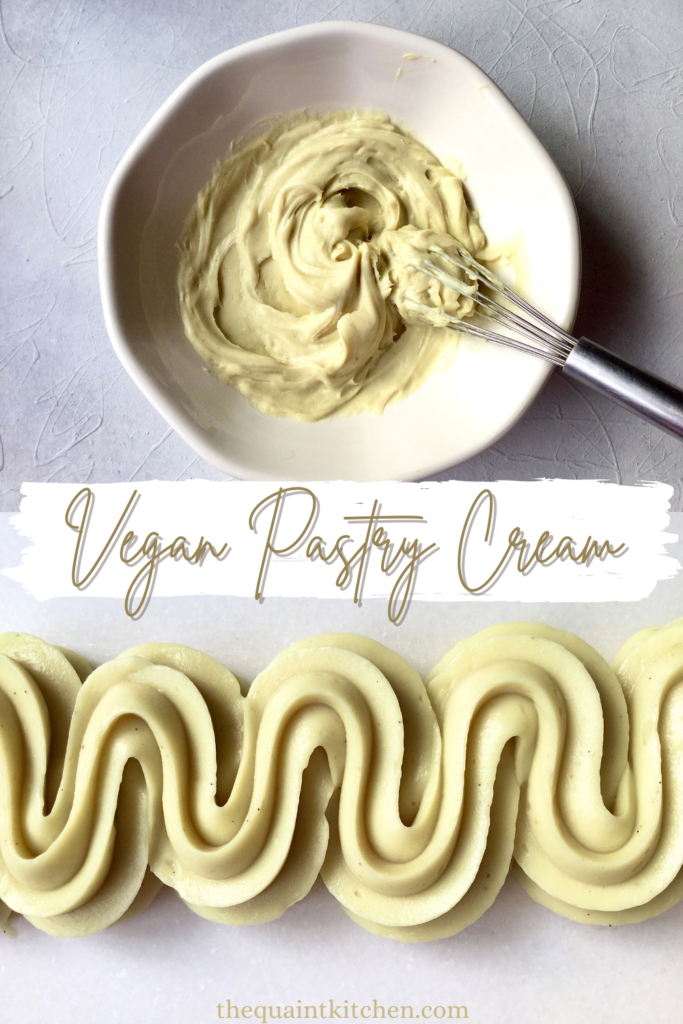
Vegan Crème Pâtissière (Pastry Cream)
This vegan crème pâtissière (or pastry cream, or custard) is the first of many recipes that will be part of the “basics” category. It’s a staple in baking and very versatile. Whether for filling a cake, a fruit tart or eating by the spoonful, it’s a practical recipe to have.
This post will be focused on how to make a vanilla pastry cream. Because once you’ve mastered that, you can make just about any flavour by changing the extract, the milk (for coconut milk for example), adding chocolate, etc. This recipe yields the perfect base for that. It’s creamy and luscious with enough sweetness to be delicious on its own as well as in a dessert or paired with other flavours.
And if you’re still not convinced, may I also add that some of my colleagues actually preferred this version to the non-vegan one? Since I originally made this recipe for a dessert at my workplace, I had almost everyone taste it side-by-side with the non-vegan one to make sure the flavour was as close as possible. And, thankfully, it passed the test!
The ingredients for vegan crème pâtissière
The base
The milk. I tested this recipe with soy milk, almond milk and cashew milk. The sweetened/original versions of them (specifically Silk, if you’re wondering). Soy milk and cashew milk yielded the best results both in creaminess and taste. Almond milk isn’t creamy enough so it was somewhat more translucent. Basically, I would avoid any plant based milk that’s too watery, like almond and rice milk.
The vanilla. Since vanilla is the most prominent flavour in the recipe, you’ll want to use a good quality one. Most chefs will say that a whole vanilla bean is best, but obviously not everyone has that. If you do, perfect. Use it. But if you don’t, vanilla bean paste or a good vanilla extract (not imitation) will work perfectly too.
The sugar. Plain ol’ white sugar is what’s used for this recipe. Although I haven’t tested it with other kinds of sugar yet, I don’t see why they wouldn’t work. Just keep in mind that a non-white sugar will alter the colour of your cream.
The cornstarch. This is what will thicken the pastry cream and make it set (along with eggs or egg yolks in a traditional one). Some recipes use flour instead, but I like to stick to cornstarch as it thickens faster and there’s less chance of it leaving a pasty finish in your mouth.
I haven’t tried using another type of starch as cornstarch sets the firmest and is the best option. Other starches like arrowroot and tapioca starch will result in a “slimier” finish, not to mention you also need more of them for the cream to thicken properly.
The butter. This recipe has a higher ratio of butter than a regular crème pâtissière to compensate for the fact that there’s no fat coming from the eggs/yolks that are usually used. It also helps to create a creamy and thick texture.
I’ve mentioned this before, but I like to use a homemade vegan butter as much as possible (what with the whole palm oil situation and all), but use whatever is available to you! I would try to use a vegan butter that isn’t too salty and has a milder flavour to avoid it overpowering the whole cream since there’s more of it than usual.
the extras
The nutritional yeast. This is optional, especially if you use a vegan butter that has quite a bit of flavour. But I find it adds a certain something you might get from eggs. You won’t detect it at all in the finished product, it’s really just for a more “complete” flavour profile.
The turmeric. This is also optional, it’s simply for colour. Just a pinch is enough to mimic the hue that egg yolks usually give the cream.
How to make it
This isn’t a difficult recipe to make, it’s just a matter of having everything prepared so it all goes smoothly.
*Optional. If you’re using a vanilla bean, you can scrape out the seeds, whisk them with the milk in a saucepan and also add the scraped bean in. Then just bring the milk to a simmer, turn off the heat, cover, and let sit 30 mintues to infuse before pulling out the vanilla bean and proceeding with the recipe. You don’t have to do it, it just helps to amplify the vanilla flavour.
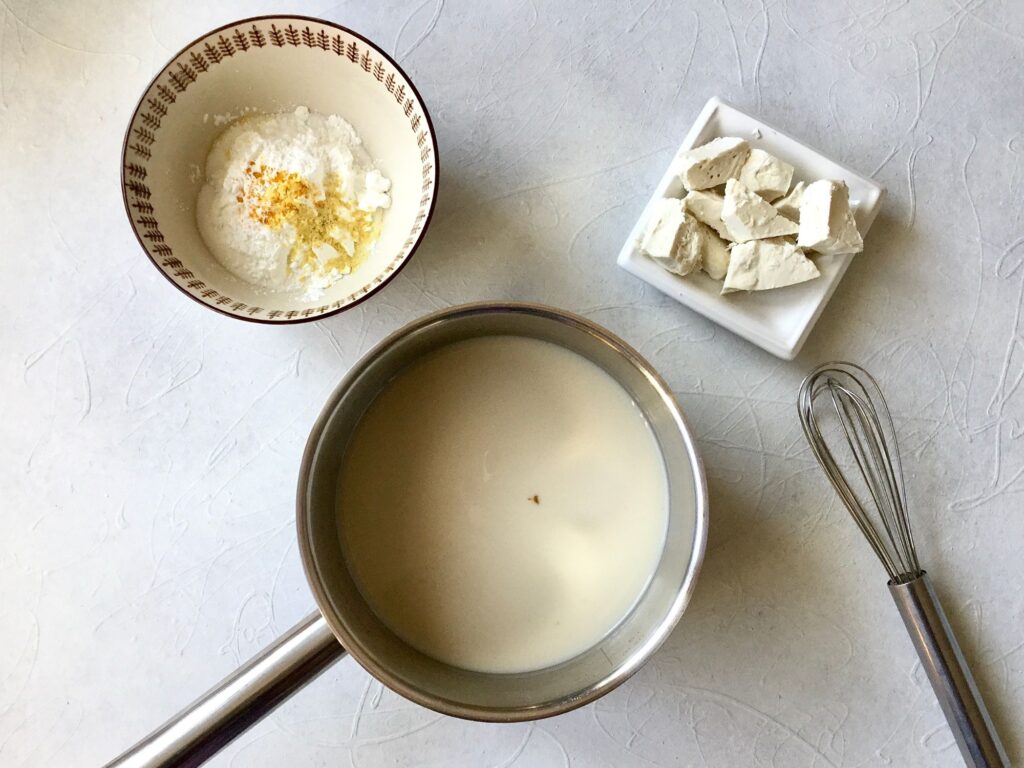
To start, whisk together the sugar, cornstarch, nutritional yeast and turmeric. The sugar will help to break up any clumps of cornstarch, which will result in a smoother cream.
Have your butter cubed up and ready. It will incorporate more easily, as well as melt faster, if it’s in cubes rather than one big piece.
Bring the milk along with the vanilla of your choice up to a simmer over medium heat. If your milk is fully boiling, it will thicken very fast once you add in the dry ingredients. So to give you a chance, it’s best to add them before that happens.
Then you’ll want to add about a quarter of the simmering milk to the dry ingredients while whisking. Usually this is done to temper the eggs and avoid them scrambling from the heat shock once they’re poured in the hot milk.
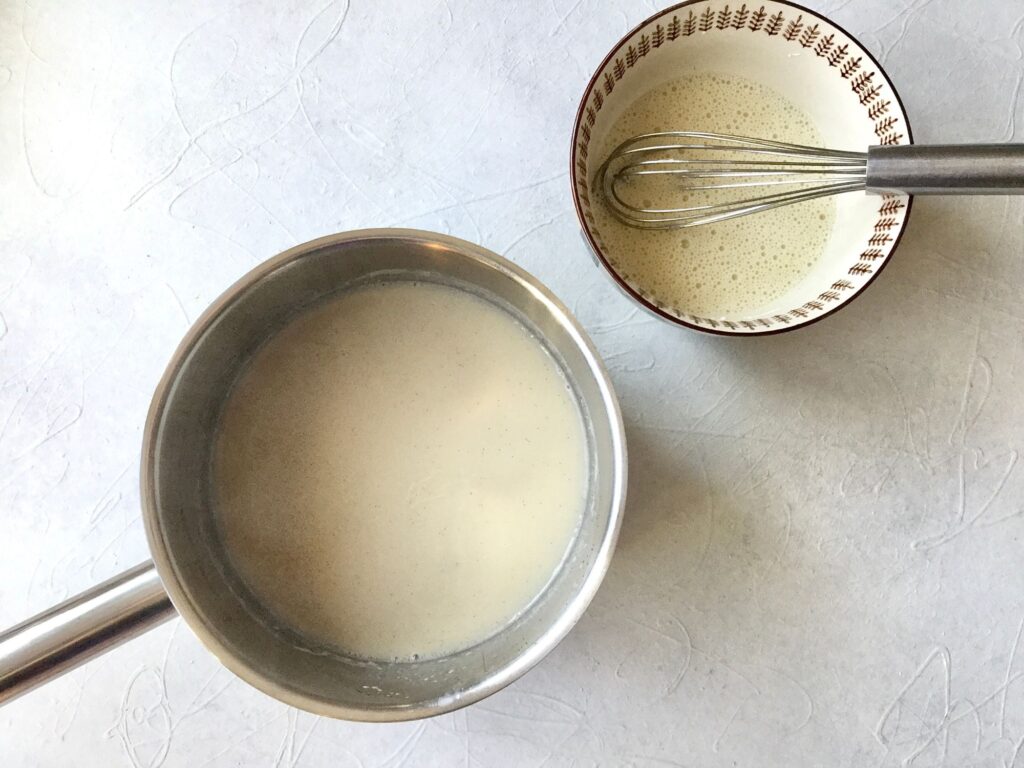
But it’s also good to heat up the cornstarch gently to avoid it from clumping or thickening immediately once added to the saucepan. Plus, it’s easier for it to get evenly distributed since you’re adding one liquid to another rather than whisking dry into wet. Make sure to whisk continuously while pouring the mixture back into the saucepan.
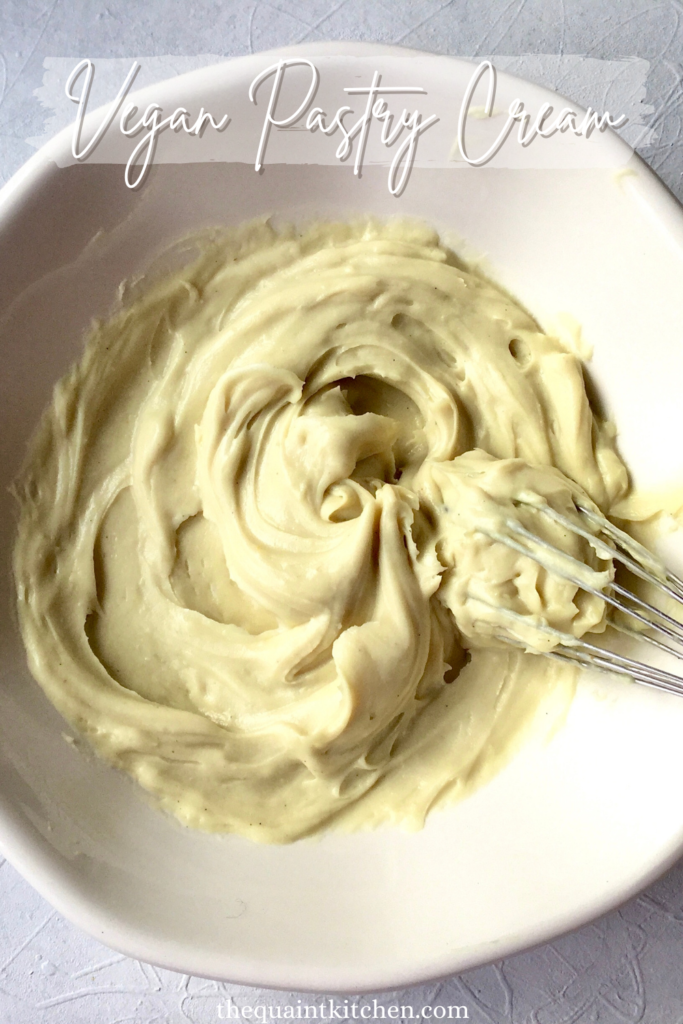
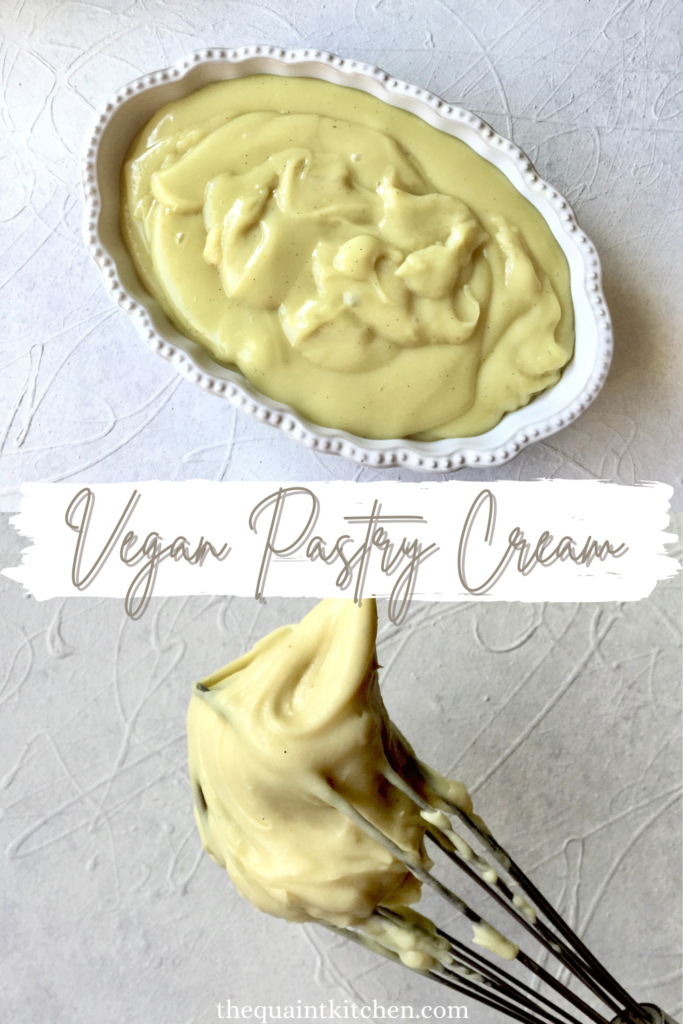
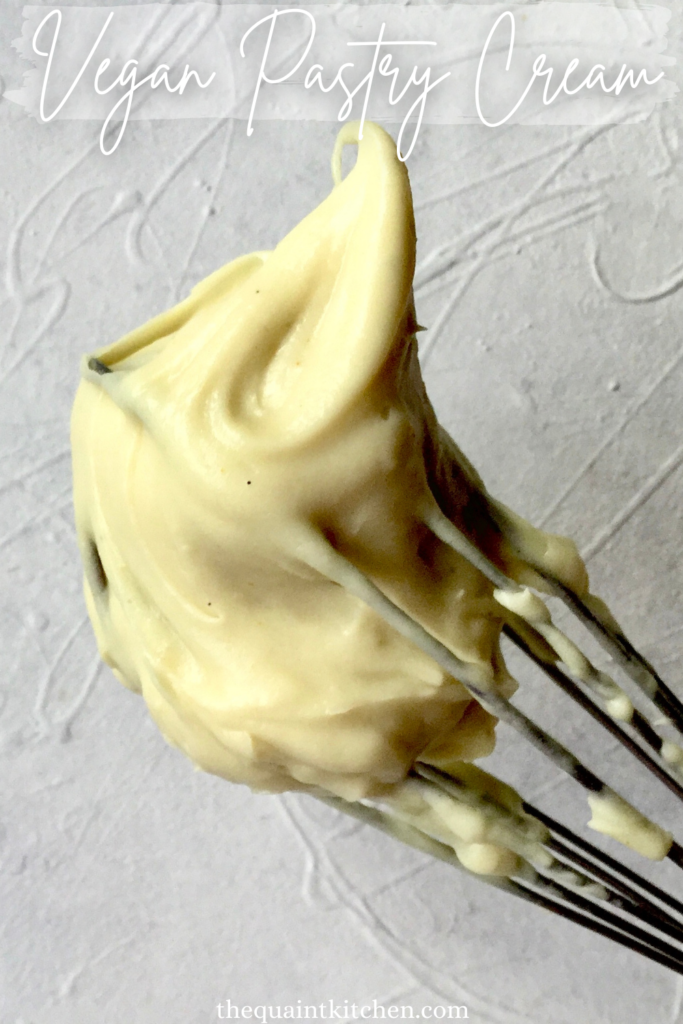
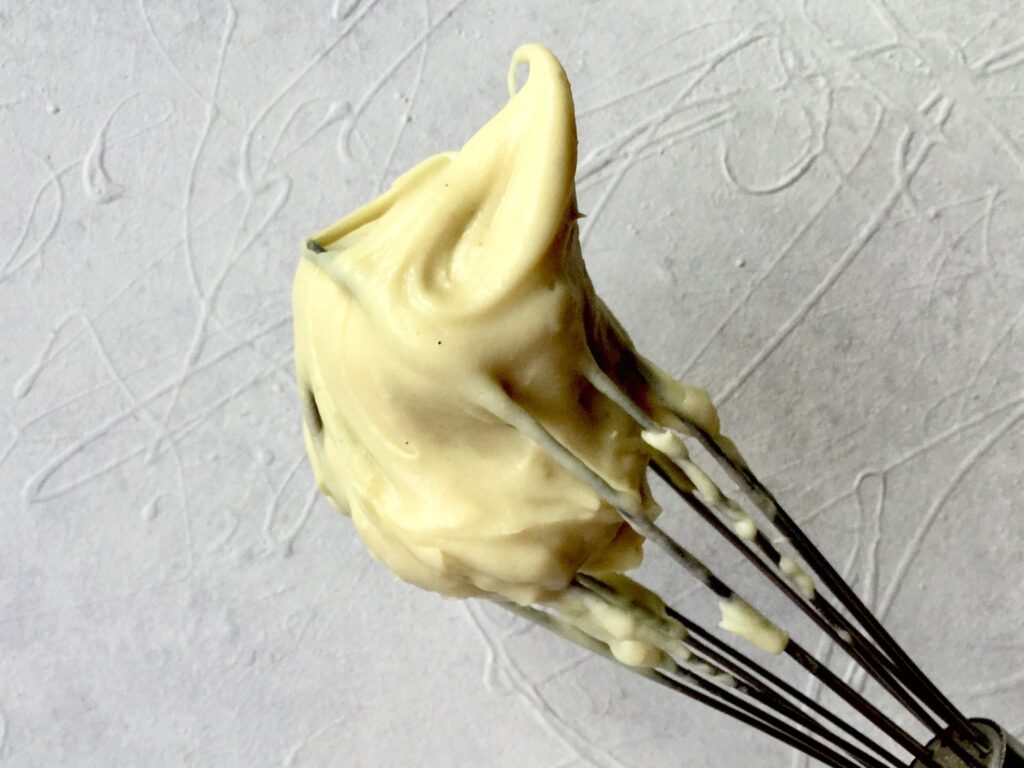
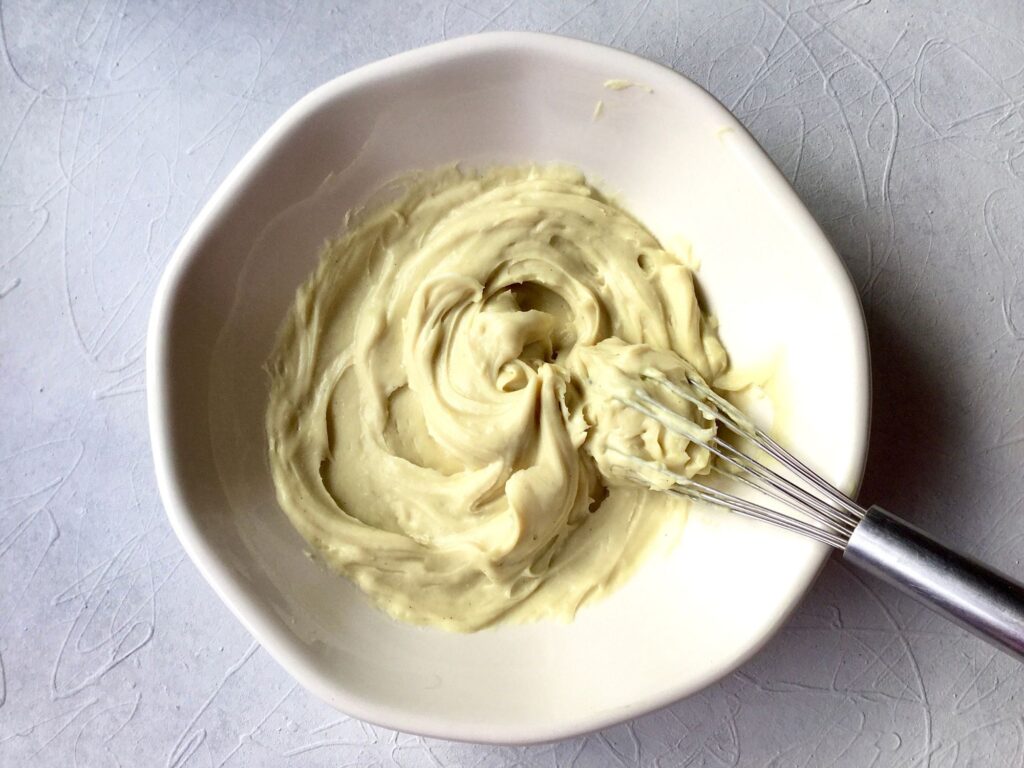
After that, it’s a matter of whisking constantly until it thickens. Make sure to get to the corners to avoid lumps. Once you feel it start to thicken, continue whisking vigorously for 1 to 2 minutes. When you stop for a few seconds, you should see a few big bubbles forming and popping. Then turn off the heat and stir in the butter until it’s completely melted and incorporated.
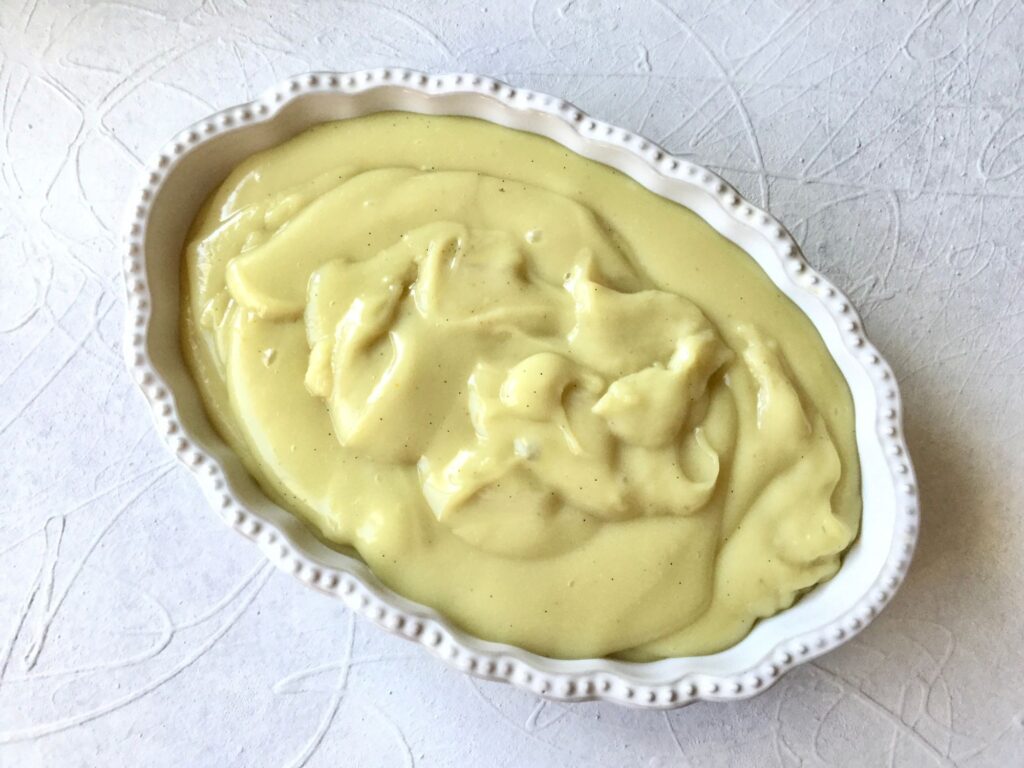
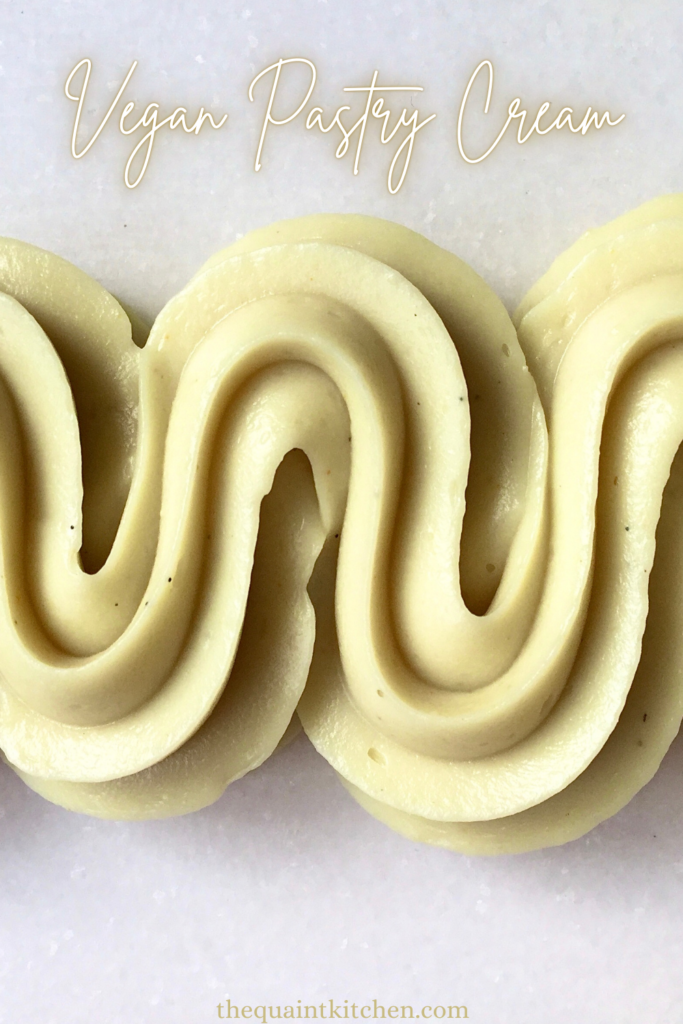
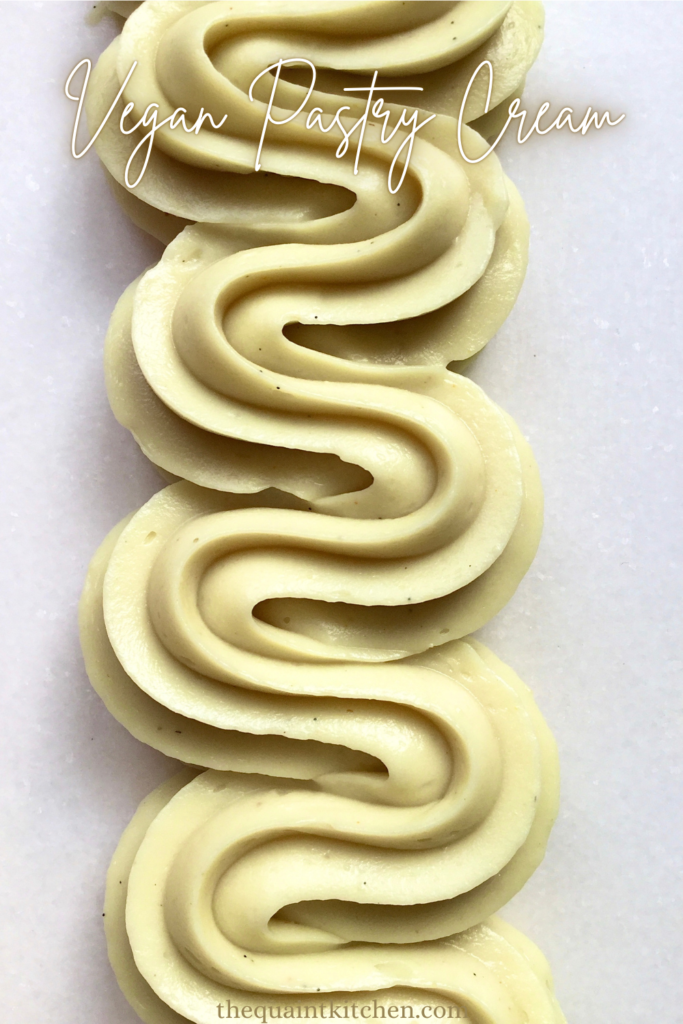
Pour the pastry cream onto a flat surface like a tray or plate with edges. The thinner it’s spread, the faster it will cool. Cover it with cling wrap directly on the surface to prevent a skin from forming and let cool completely in the fridge for at least one hour.
if you still get a lumpy pastry cream
If even after “tempering” the dry ingredients, whisking vigorously and getting into the corners, your pastry cream comes out lumpy, an immersion blender should do the trick. Transfer the cream to a tall but slim container and blend it (after you’ve stirred in the butter). This will smooth it out and make for a silky texture. Even without lumps, using an immersion blender improves the texture of this vegan crème pâtissière, if you want to go the extra mile. You can also strain it through a fine mesh strainer, but if it’s very lumpy, there might still be some small ones left.
How to use and store vegan crème pâtissière
When you’re ready to use it, transfer it to a bowl and stir it vigorously with a stiff spatula or whisk until smooth. It will be quite jelly-like so pressing it into the side of the bowl helps to break it up initially. You can also do this with an electric mixer or stand mixer with the paddle attachment.
This vegan crème pâtissière will keep in the fridge for up to 4 days (always with cling wrap directly on the surface). And it can’t be frozen because it would cause it to weep and split. So I guess you’ll just have to eat any leftovers. Ah, the sacrifice.
I know this was an extra long post with a lot more mumbo jumbo than usual, but i hope it was helpful to those of you who read it! I always find this kind of stuff interesting so maybe some of you do too. Either way I’m glad you’re here! And whether you read it or not, I hope you like the recipe.
If you make this recipe please let me know in the comments! All feedback is very much appreciated and I would love to hear from you! You can also tag me on instagram @the.quaint.kitchen or use the hashtag #thequaintkitchen to share your creations!
Vegan Crème Pâtissière (Pastry Cream)
Ingredients
- 250 g soy or cashew milk, sweetened
- 1/2 scraped vanilla bean, or 1/2 tsp vanilla bean paste or 1 tsp vanilla extract
- 30 g white granulated sugar, if using unsweetened milk add 1 tsp more
- 25 g cornstarch
- 1/4 tsp nutritional yeast, optional
- pinch of turmeric, optional
- pinch of salt
- 60 g vegan butter, i use this one
Instructions
- *Optional: if using a vanilla bean, scrape the seeds out and stir them into the milk along with the scraped bean. Bring to a simmer, turn off the heat, cover and let infuse for 30 minutes, then pull out the scraped bean and proceed with the recipe.
- Have your butter cubed up and ready.
- In a small saucepan, heat the milk and vanilla over medium heat until barely simmering.
- Add about 1/4 of the milk to the dry ingredients while whisking. Then pour that mixture back into the saucepan while also whisking.
- Return to the heat and whisk constantly. When it starts to thicken, whisk vigorously for 1 to 2 minutes, making sure to get the corners. When you stop for a few seconds, you should see a few big bubbles coming to the surface and popping.
- Turn off the heat and whisk in the butter until completely melted and smooth then pour the cream onto a tray or plate with edges. The thinner it’s spread the faster it will cool.
- Cover with cling wrap directly on the surface to prevent a skin from forming and store in the fridge for at least 1 hour to set.
- When it’s ready to be used, transfer it to a bowl (it will be quite jelly-like) and whisk or stir with a stiff spatula until smooth and creamy. You could also do this with an electric mixer or stand mixer with the paddle attachment.
- *Update* While testing the blueberry custard bars I tried making the pastry cream in the microwave and it worked amazingly, so there’s also that option.In the microwave: In a microwave-safe bowl, Whisk together the sugar, cornstarch, nutritional yeast, turmeric and salt. Add in the vanilla then slowly add in the milk while whisking to prevent lumps. Add in the butter (melted or not) and heat the whole thing in the microwave in 30 second bursts, whisking in between, until it has bubbled, thickened and is completely smooth. And voilà!
Notes
- I strongly suggest making recipes by weight, if you make them by cups I can’t guarantee that you’ll get the same results.
- You can easily flavour this however you like by changing the extract, the milk, adding chocolate, adding alcohol, etc.
- It will keep for up to 4 days in the fridge with cling wrap directly on the surface.
I am a professional vegan baker for 13 years and constantly looking for inspiration.
This recipe gave the best result ever!
I also made a lemon curd based on it: replaced 40 g. milk with 40 g. lemon juice plus graded pill of two lemons.
Thanks a million, Tatyana!
Oh wow thank you Roee, it means so much. Vegan bakers unite! 13 years is amazing.
So happy you liked the recipe, thank you again for the kind words!
I haven’t made it yet but I’m interested in making this with a lime taste to it ! Kind of like a faux key lime filling. Do you think the lime would affect the recipe ? Or any tips on how I should go about it ? 🙂
Thank you !!
Hi Maria! Sorry for the very late response, but if you’re still wanting to make it I would recommend doing my lemon curd recipe but with lime juice instead of lemon rather than trying to adapt this recipe. It’ll be much easier than trying to get the flavours right with this one!
https://thequaintkitchen.com/en/vegan-lemon-curd/
Very good recipe. Tastes like real creme pat. Tip:If adding dry ingredients, add it to the sugar-cornstarch mixture, not at the end, as it may become grainy (I had this problem with cinammon).
Thanks for the feeback Finn! Glad you liked it😊
I live in a country where only one brand of soy milk is available and it is chock-full of thickeners, so I looked up the ingredients in Silk to see whether I could find a comparable nut milk. I noticed gellan was listed, which is used in molecular gastronomy to create thick creams and custards – I think this was why you had such great results with that particular brand! Just wanted to share. Thanks for the fantastic recipe, looking forward to trying it out!
Thanks for sharing your thoughts! You’re very right, although if you’re wondering, I’ve tried with many other milks and it still works great! I especially loved it with Bonsoy soy milk which doesn’t contain any thickeners. So they certainly help/add a little something but not in a way significant enough for them to be a must here!
I made this as written…fabulous! For a chocolate version should I add melted chocolate or use cocoa powder? Thanks for any help 😀
Amazing! So glad 😊 you can do either, or both! The more melted chocolate you add the stiffer the cream will get though so just something to keep in mind. I like adding some melted chocolate along with some cocoa powder for deeper flavour!
Wonderful flavor and texture! I used oat milk and it worked great
Thank you for the lovely comment Kelly, so glad you liked it!
This was so good! I am not vegan, but a family member requested a lactose free dessert for a special occasion. This totally holds up to any traditional pastry cream, plus it’s really easy to make. I added pulverized freeze dried berries to flavor it and it was a huge hit as the filling for a rolled pavlova. Thank you!
Love what you did with the recipe Evin! Sounds delicious! Thanks for the lovely feeback ☺️
I’m so pleased I found this recipe. I did the microwave version, and it turned out really, really well. I used it for strawberry tartlets and they were delicious. I’m going to make the Blueberry Bars next!
Thanks for sharing Shirley, I’m so glad you enjoyed it! Microwave method is definitely my go-to, it’s awesome! I hope you’ll like the blueberry bars as well ☺️
Sorry -can’t rate, because haven’t tried it yet. Just here to express disappointment that butter is needed. So will have to follow ANOTHER recipe just to try this one. Thus not the holy grail I’ve been seeking, sadly.
Hi! No need for disappointment, if you have access to store-bought vegan butter then you can simply use that, the homemade one is for those who don’t, or wish to make their own due to other reasons.
Thank you so much for this recipe!! I made this to fill a fruit tart for a friend who has an egg allergy, and it turned out great (her husband couldn’t tell the difference between this and an egg version)! I also made a passionfruit version by substituting half the amount of milk for passionfruit puree – DELISH!!
Amazing Nikki I’m so glad you all enjoyed it! Thank you so much 😊 Passion fruit version sounds delicious!
This is the best, most authentic crème patisserie I’ve ever made! I used Miyoko’s vegan butter and it came out great. Thanks for sharing!
That’s awesome Donna I’m so glad! Thank you! Miyoko’s really is top tier 👌🏻
This is incredible. Now how do I turn this into an almond cream that I can use as a almond croissant filling?
Glad you like it Sahil! I would just go with an actual almond cream or frangipane recipe, this wouldn’t give you the right texture unfortunately. It would be more like a custard danish 🙂
Absolutely amazing! One of the best recipes I’ve ever used! I used a real vanilla bean and did the 30min infusion. Insanely good flavour!
Oh wow thank you so much! 30 minute infusion is definitely a game changer 👌🏻 So happy you liked, thank you for your lovely comment!
This is my go-to pastry cream recipe now! The microwave method is genius! Thanks so much, Tatyana 🙂
LOVE the microwave method! Thank you so much for trying it and for the kind comment Gönül! So happy you liked it☺️
The microwave trick is absolutely genius. Turned out delicious; I filled Boston cream donuts with it. Thanks so much!
It’s magic I love it! I’m so glad it was delicious, thank you for letting me know! Mind if I steal one of those donuts?👀
If using the m-wave method, how many 30sec cycles does it take? Needing a thicker custard for my strawberry tart.
Hi Ani! In my microwave it takes about four 30 second bursts, but it may take less or more time in yours. Once it’s thickened, it’s done. But if you want a properly thick custard, I would stick to the stovetop method, that way you can boil it longer, and it gives a thicker result compared to the microwave method!
Works so well! I thought it would be gluey but not at all! Thanks!
Yay so happy you liked it Natalie! 😊
I used the microwave method and it was so easy I felt like I was cheating! It tastes great too.
Right!! Absolute witchcraft! Thanks Bonnie 😋
Great recipe. I will be using this regularly in my work.
Works with minor figures organic oat
That’s awesome Chris, good to know it works well with minor figures! Thanks for giving the recipe a shot 🙂
So tasty! Used vanilla extract, half xylitol & half brown sugar (for the colour), lastly 10ml of Amaretto along with the butter in the end… It was tough not to keep testing it! For the record 1 tablespoon of sugar is 12gr, which I did not google so added a lil extra but will add some whipped cream in it tomorrow and sort that out! Delicious!
Oh wow that sounds amazing Marina! I’m so happy you liked it! Thank you for the awesome comment ☺️
My partner and I looove this recipe! I make it often now and add it to fruit tarts, use it as a donut filling and we’re looking forward to making your blueberry bars. Thanks for sharing such a great recipe!
Thank you so much for the kind comment Maha! So happy you like the recipe, hope you like the blueberry bars just as much! ☺️
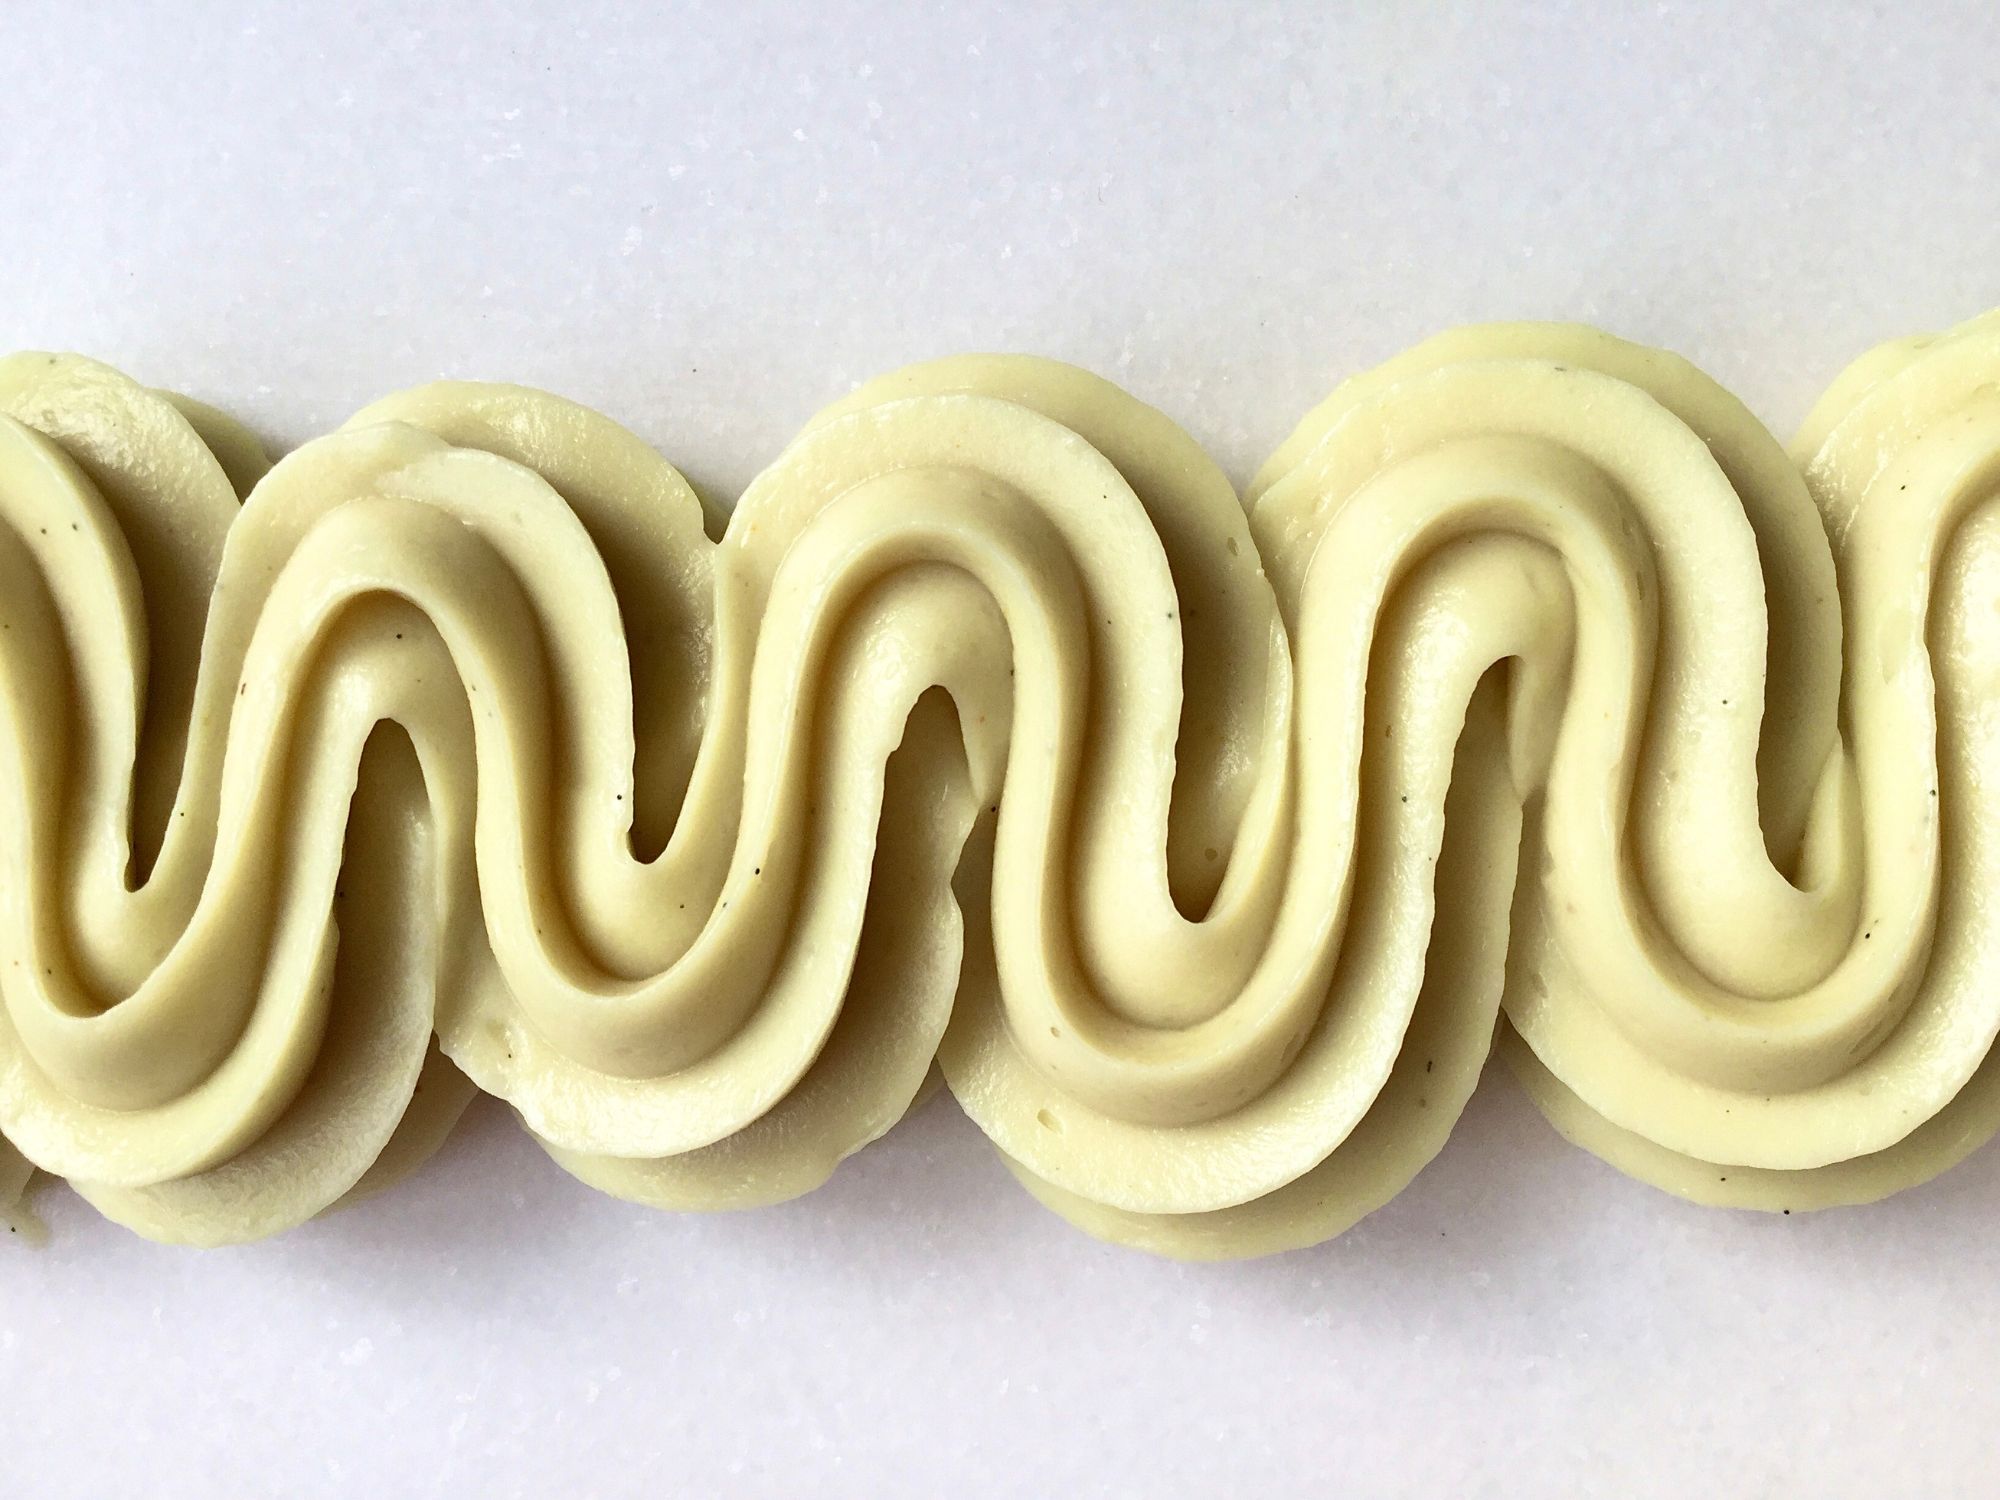
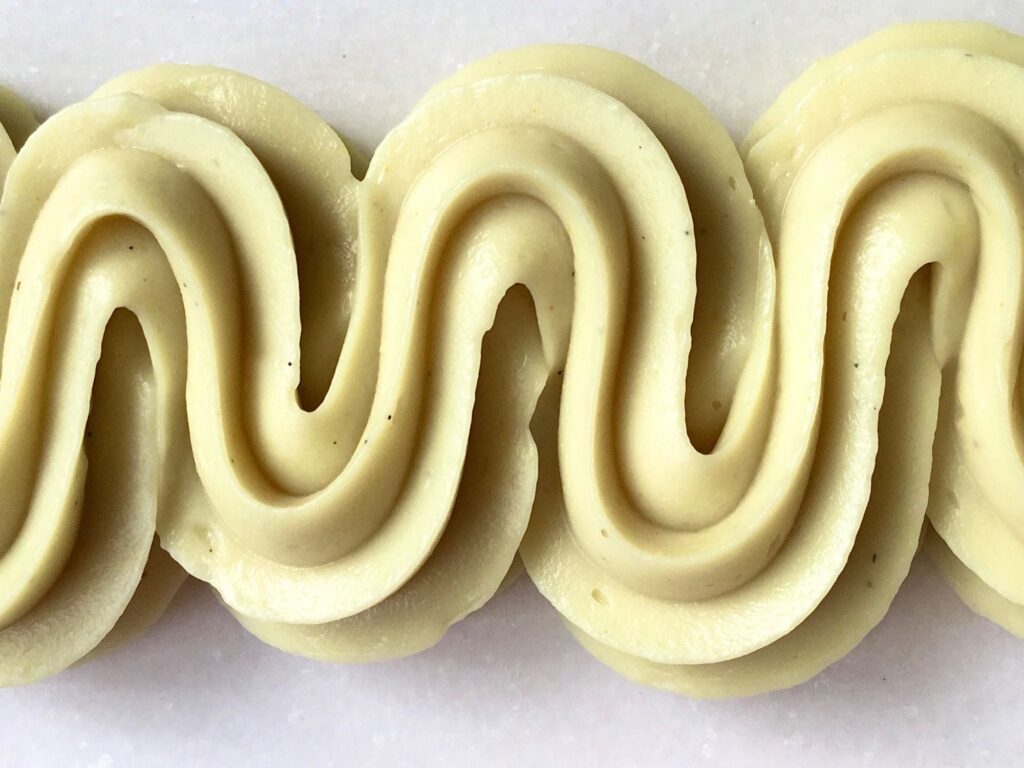
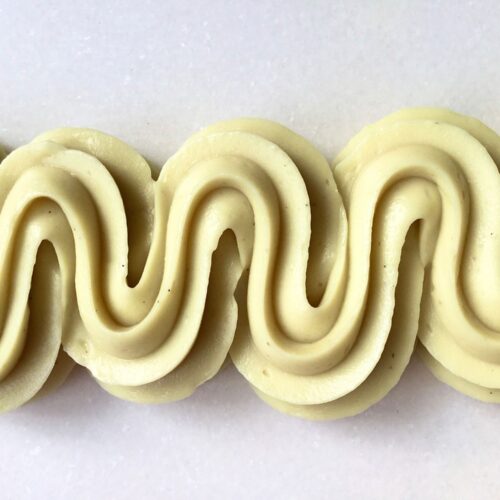
Does this hold shape and can I make designs ?
Hi Ani! Yes it holds its shape really well, it’s easily pipable. But keep in mind it’s still a custard so it’ll form a skin after a few hours of exposure to air. I wouldn’t suggest frosting or decorating a cake ahead of time with it for example, but as a filling it’s great!
Thank you!
Thanks for a great recipe! I made it with Oatly Barista (3% fat oatmilk).
I added some freeze dried strawberry powder too, since I used it for a strawberry tart. 👍🏻
That sounds amazing RJ! Thank you for the feedback, I’m so happy you liked the recipe! And good to know it also works with Oatly👌🏻 How funny I’m just about to post a strawberry tart using this recipe!
I found your site through this recipe and I’ve been bookmarking almost every recipe I’ve seen. Thanks for the fantastic work!
Thank you so much Laura it means the world!! And thanks for taking the time to comment and let me know, I’m so glad you’re enjoying the recipes, it makes all the work worthwhile 😊
This vegan crème pâtissière was delicious and worked perfectly. I added some pureed mango for a fresh fruit taste and it was great. I’d love to see a vegan choux pastry recipe!
Yay I’m so happy you liked it Kath, I’m sure it was delicious with the mango! Vegan choux pastry is the bane of my existence 😂 but it’s on my list!
Glad it is on your list. I’ll looking forward to finding out if you crack it.
Me too! We’ll see 🤞
Hi, thank you for this wonderful recipe although yet to try but looking forward to see vegan choux. I have tried multiple attempts especially without eggs and can’t get it to work.
No problem Vinay! Yeah vegan choux is really tricky, still working on it!